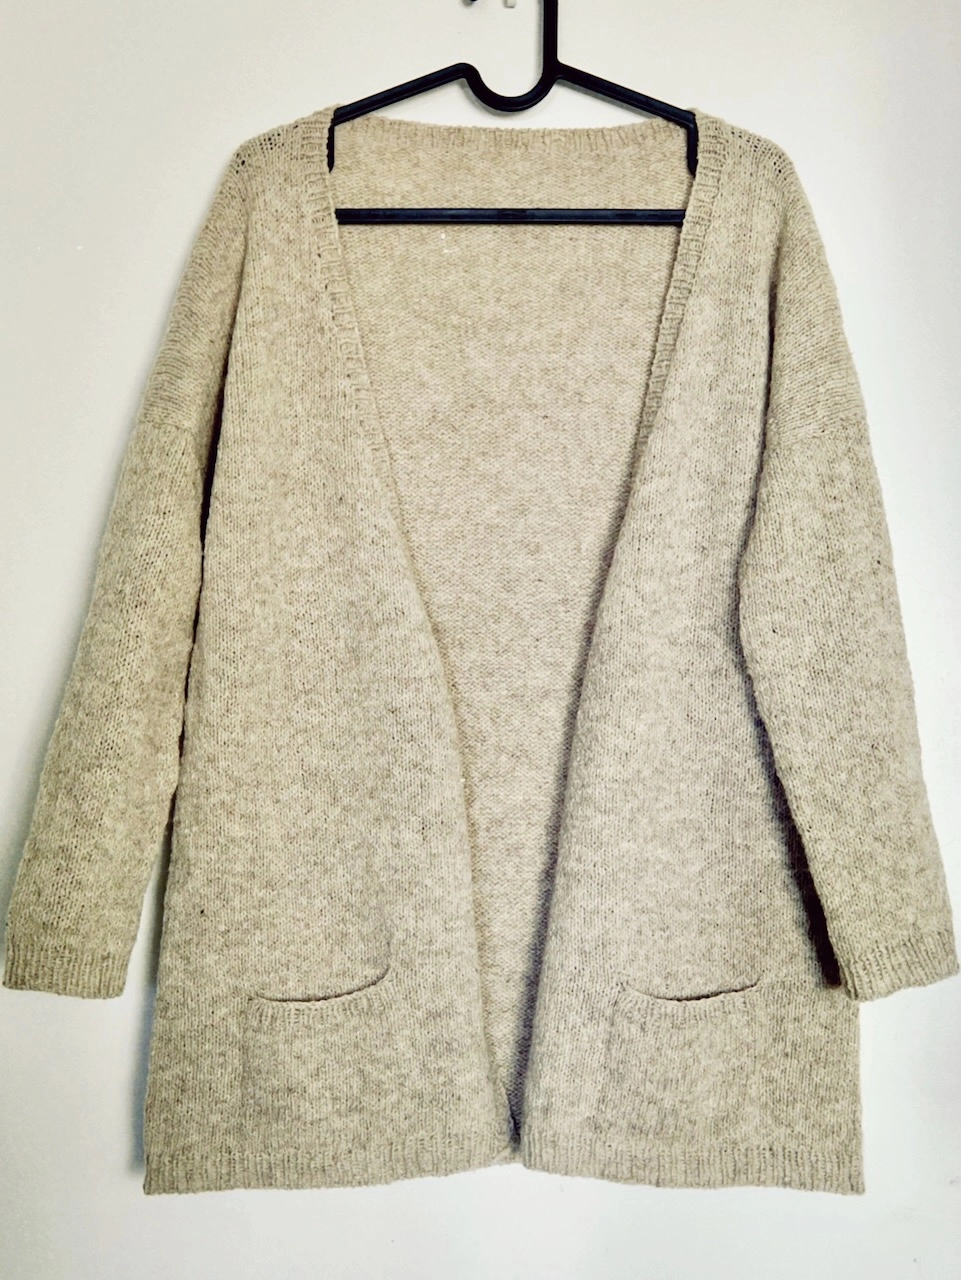
Johanne Cardigan - Beige Ver.
September 28, 2025
Project recap
- Ravelry: PurringYarn’s Johanne - Beige Ver.
- Time spent: 72 hours
- Yarn: Laines Paysannes Fil à tricoter, 2 fils (Grège)
- Needle: US 8, US 6, US 4
- Gauge: 22 sts x 31.5 rows = 4’‘x4’'
- Duration: -
- Pattern: Johanne
- Designer: Katrin Schneider
IT’S FANTASITIC! I love the fit and cut so much. So classic. By combining with the natural, undyed French yarn, this is such a classic piece that can be paired with anything. I do wish the yarn a bit softer though - the French yarn is more rustic than I thought. It almost feels like Canadian wool, but in Sports weight.
I used three different sizes of knitting needles to keep the stitch consistent:
- Main body: US 6
- Sleeves: US 8 (on 9’’ circular, my gauge is tighter on smaller circular for some reason)
- Ribbing: US 4
Pattern planning
Finally, the time for my cardigan! I was going back and forth with the pattern option for this one. The initial plan was a long cardigan (as a replacement to one of my current one) so my eyes were on No Frills Cardigan, but for some reason I don’t like the cut (I didn’t realize until later I found out it’s the raglan line that I dislike). It stayed in my queue for quite a while until I saw Field Day Cardigan, which is a classic, relaxed fit cardigan. The only problem is that I want to use up this French sourced yarn but Field Day won’t consume that much, and I have no intention to make this classic cardigan longer. Finally I found Johanne, it is a long cardigan that looks like No Frills but doesn’t have the raglan increase line, which then I figured is why I dislike. My gauge is a bit off, with appx. 22 sts/4 on US6, but I can go with a slightly bigger size. Not a problem.
Size and modifications
I’m knitting a size 38 to get the measurement of size 32 as I’m using a thinner yarn(Sports weight instead of holding 2 strands together) and my gauge is different from the pattern.
Sleeves
- Pick up based on this tutorial instead of regular pick and knit, by picking up the “bar” first for the round and then ktbl
- Knit 19 plain round and increase at the 20th round
- After that, increase at every 12th round, until there’re 44 sts left
- Knit another 12 plain round. At this time the length should be appx. 13.5''
- In the next round, change to US 6 needle and knit a plain round
- Do 1x1 rib for 10 round
- Italian bind off for 1x1
Neckband, pocket and hem
- Knit the 1x1 rib neckline as described. Initially I knitted few more rows but found it looks a bit chunky, so I unravelled back to 2cm length.
- Italian tubular bind off for the all the rib, which takes forever and hard to manage the long thread for the neckline, but I think it’s worth it!
- Seam the pocket using this method Seaming garter stitch with mattress stitch. It looks really neat and invisible.
Note: The hem has a weird problem of flipping/curling outwards, which I never encountered before. After blocking and wearing the problem disappeared, as my googling result suggested. Yay!
Tips for flicking purl
I got lots of practice on flicking purl when working the long, endless process of knitting flat stockinette. My inspiration comes from Hazel Tindall, the world’s fastest knitter. What I observed is that the right index finger has to flex downwards when pulling out of the needle. This way can avoid the stitch slipping off, which happens a lot for purl stitches. It’s a bit challenging at the beginning and required high level of dual hands coordination, but I got hang of it quickly! I won’t say it’s noticeably faster than my previous method, but it definitely improve the quality of purl stitch and now they are rarely slipped off, which was why I slowed down during purl row.
This yarn chicken turned out to be too big
Well, as I mentioned I wanted to use up all the yarn, but turned out I bought too much - the remaining yarn is almost an entire skein. Sigh. I can’t knit the length too long because I’m a short, petite female. I’ll probably use it for something else as part of my stash.
Project timeline
- – Cast on.
- - Finish the front and start left sleeve.
- - Start the right sleeve.
- - Bind off and wash.
- - Blocked.
New techniques learned
- Set-in pocket
- Pickup sleeves: picking up based on this tutorial, instead of regular pick and knit, pick up the “bar” first for the round and then ktbl