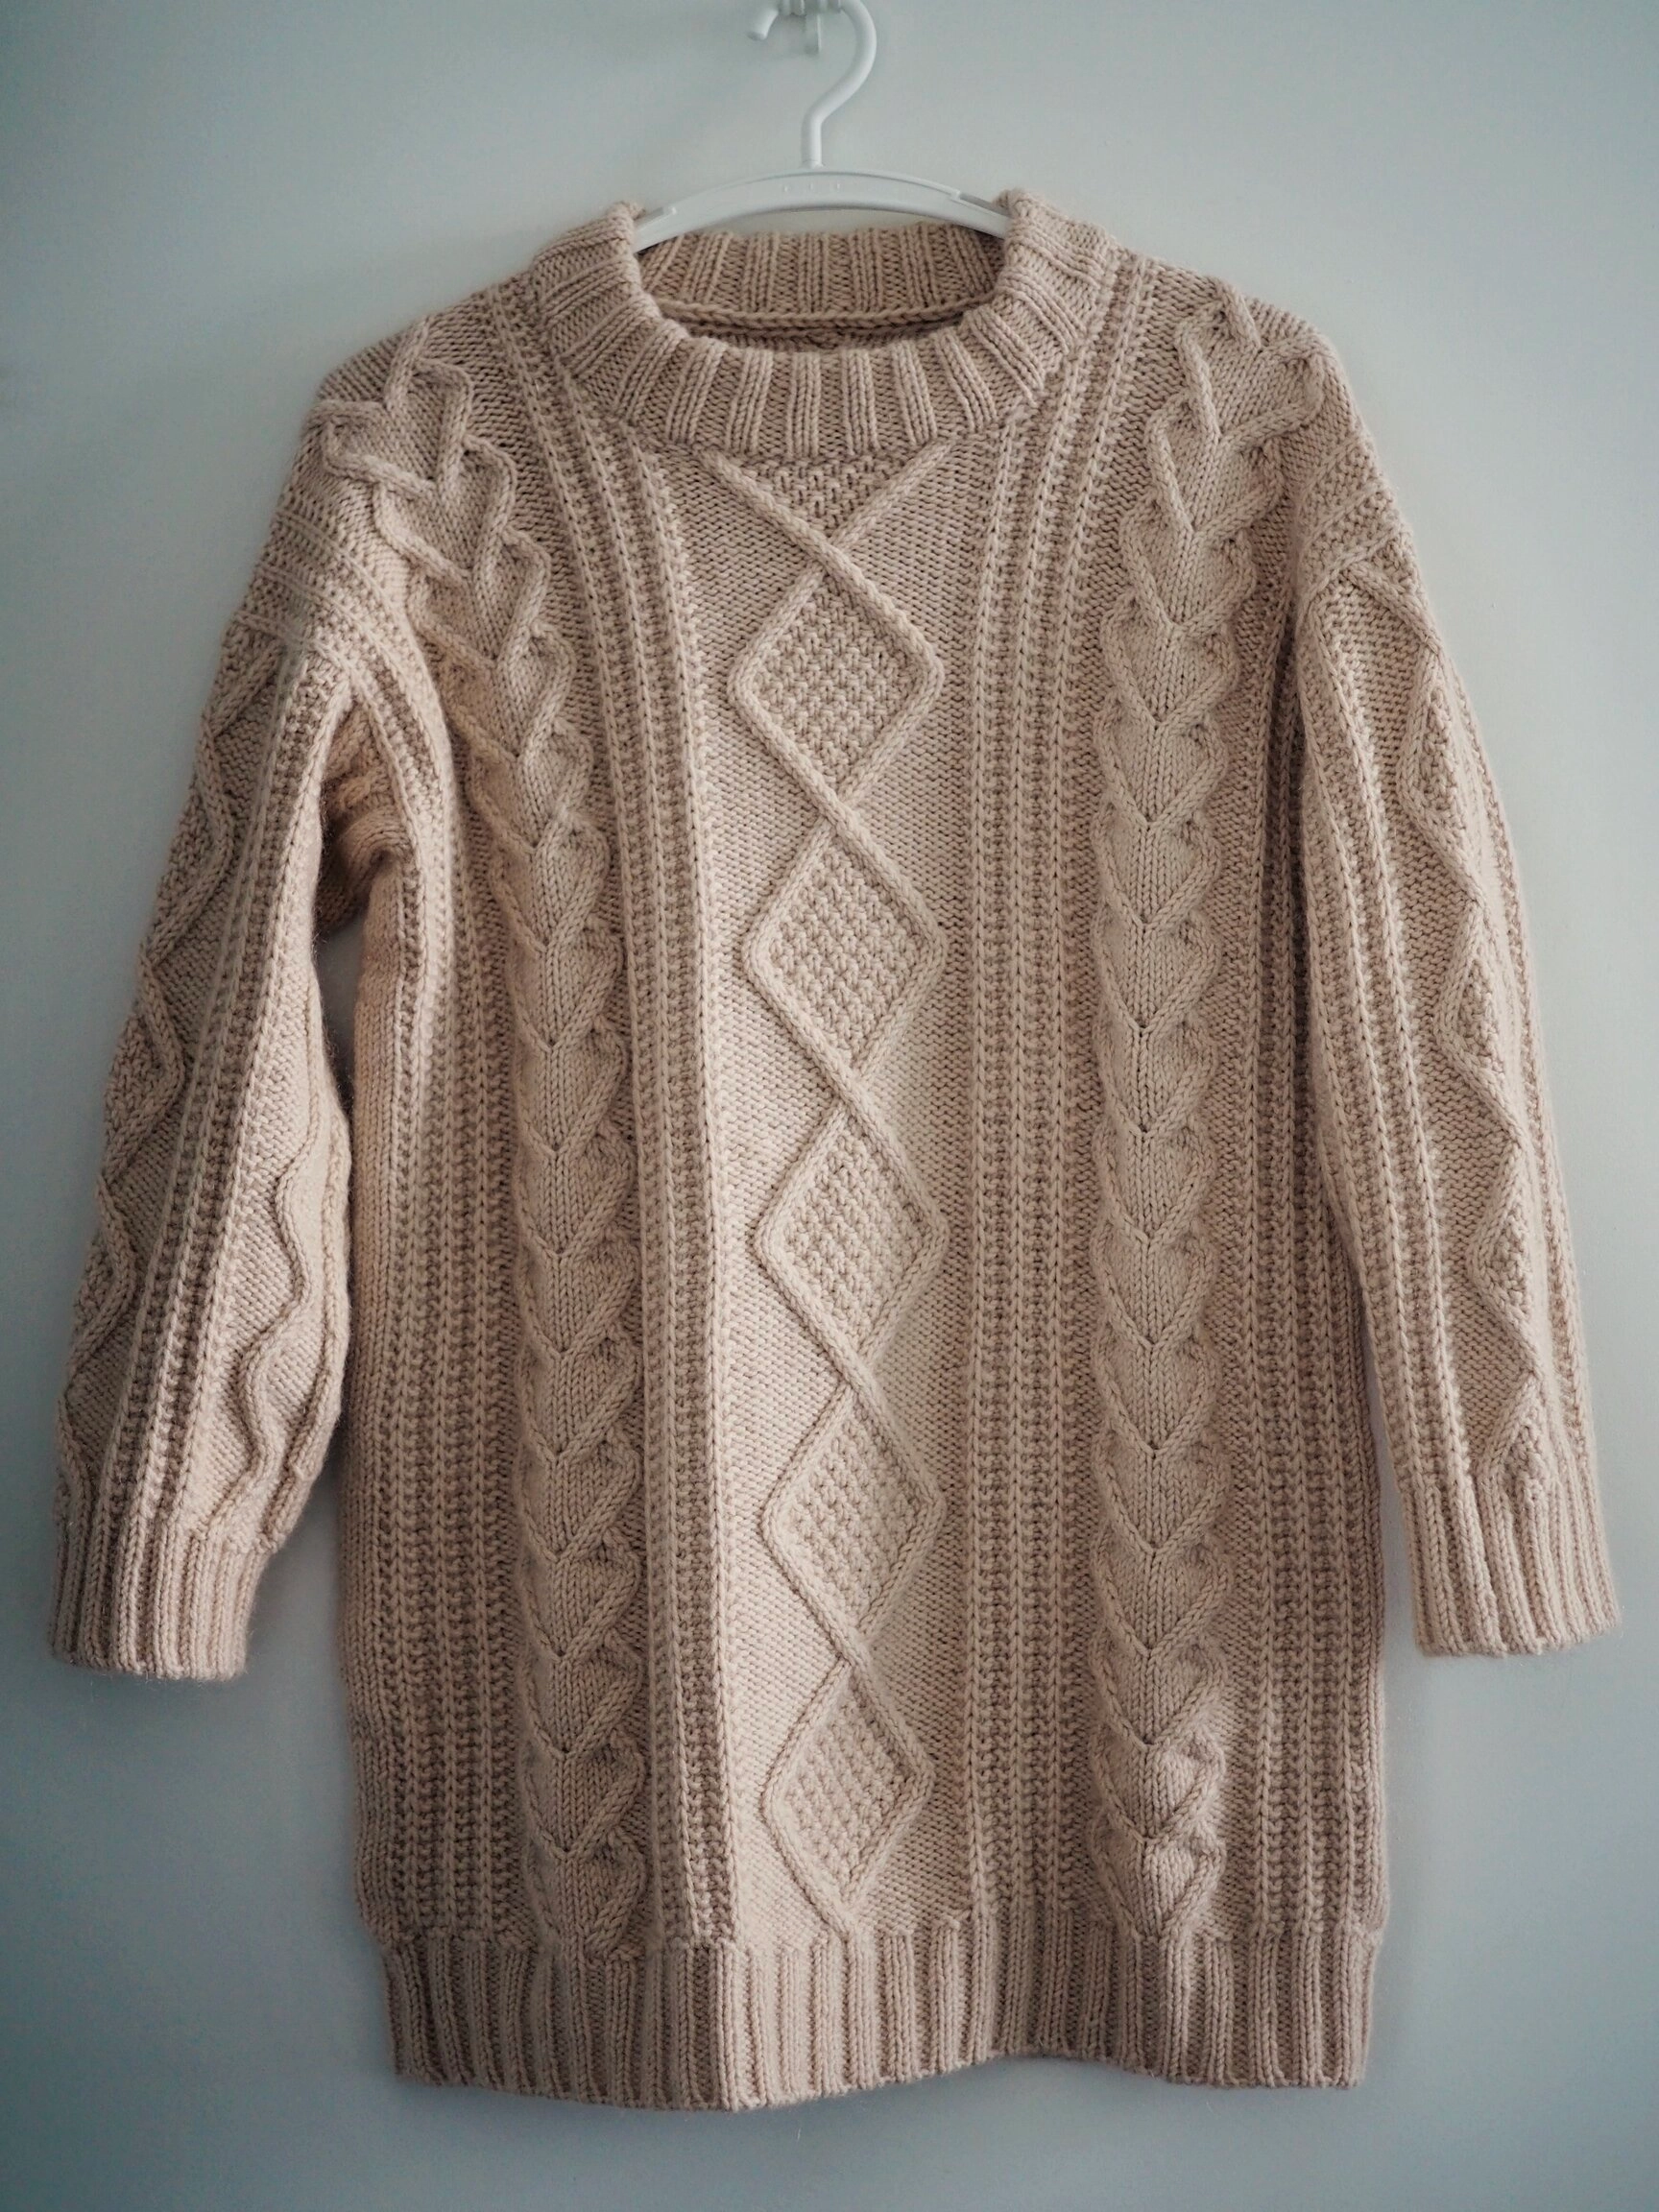
Heart and Chain Sweater - Ivory Dress Ver.
February 16, 2026

Project recap
- Ravelry: PurringYarn’s Heart Chain Sweater - Ivory Dress Ver.
- Time spent: 111 hours
- Yarn:
- Solid: Loveyarn 回归线 溯原(米红)
- Mohair: Loveyarn 回归线 慕顏(米杏)
- Needle: US 7/4.5mm, US 5/3.75mm (rib)
- Gauge: 18 sts = 4''
- Duration: -
- Pattern: Heart Chain Sweater by From Mayo
Size
I’m knitting size S with US 7 in order to achieve the gauge and desired measurement. I have to lengthen the chart A LOT because my row gauge is way smaller due to the smaller needle.
After blocking, the bust is appx. 40" with 9.4" positive ease, and the length is 29.5".

Pattern design and modifications
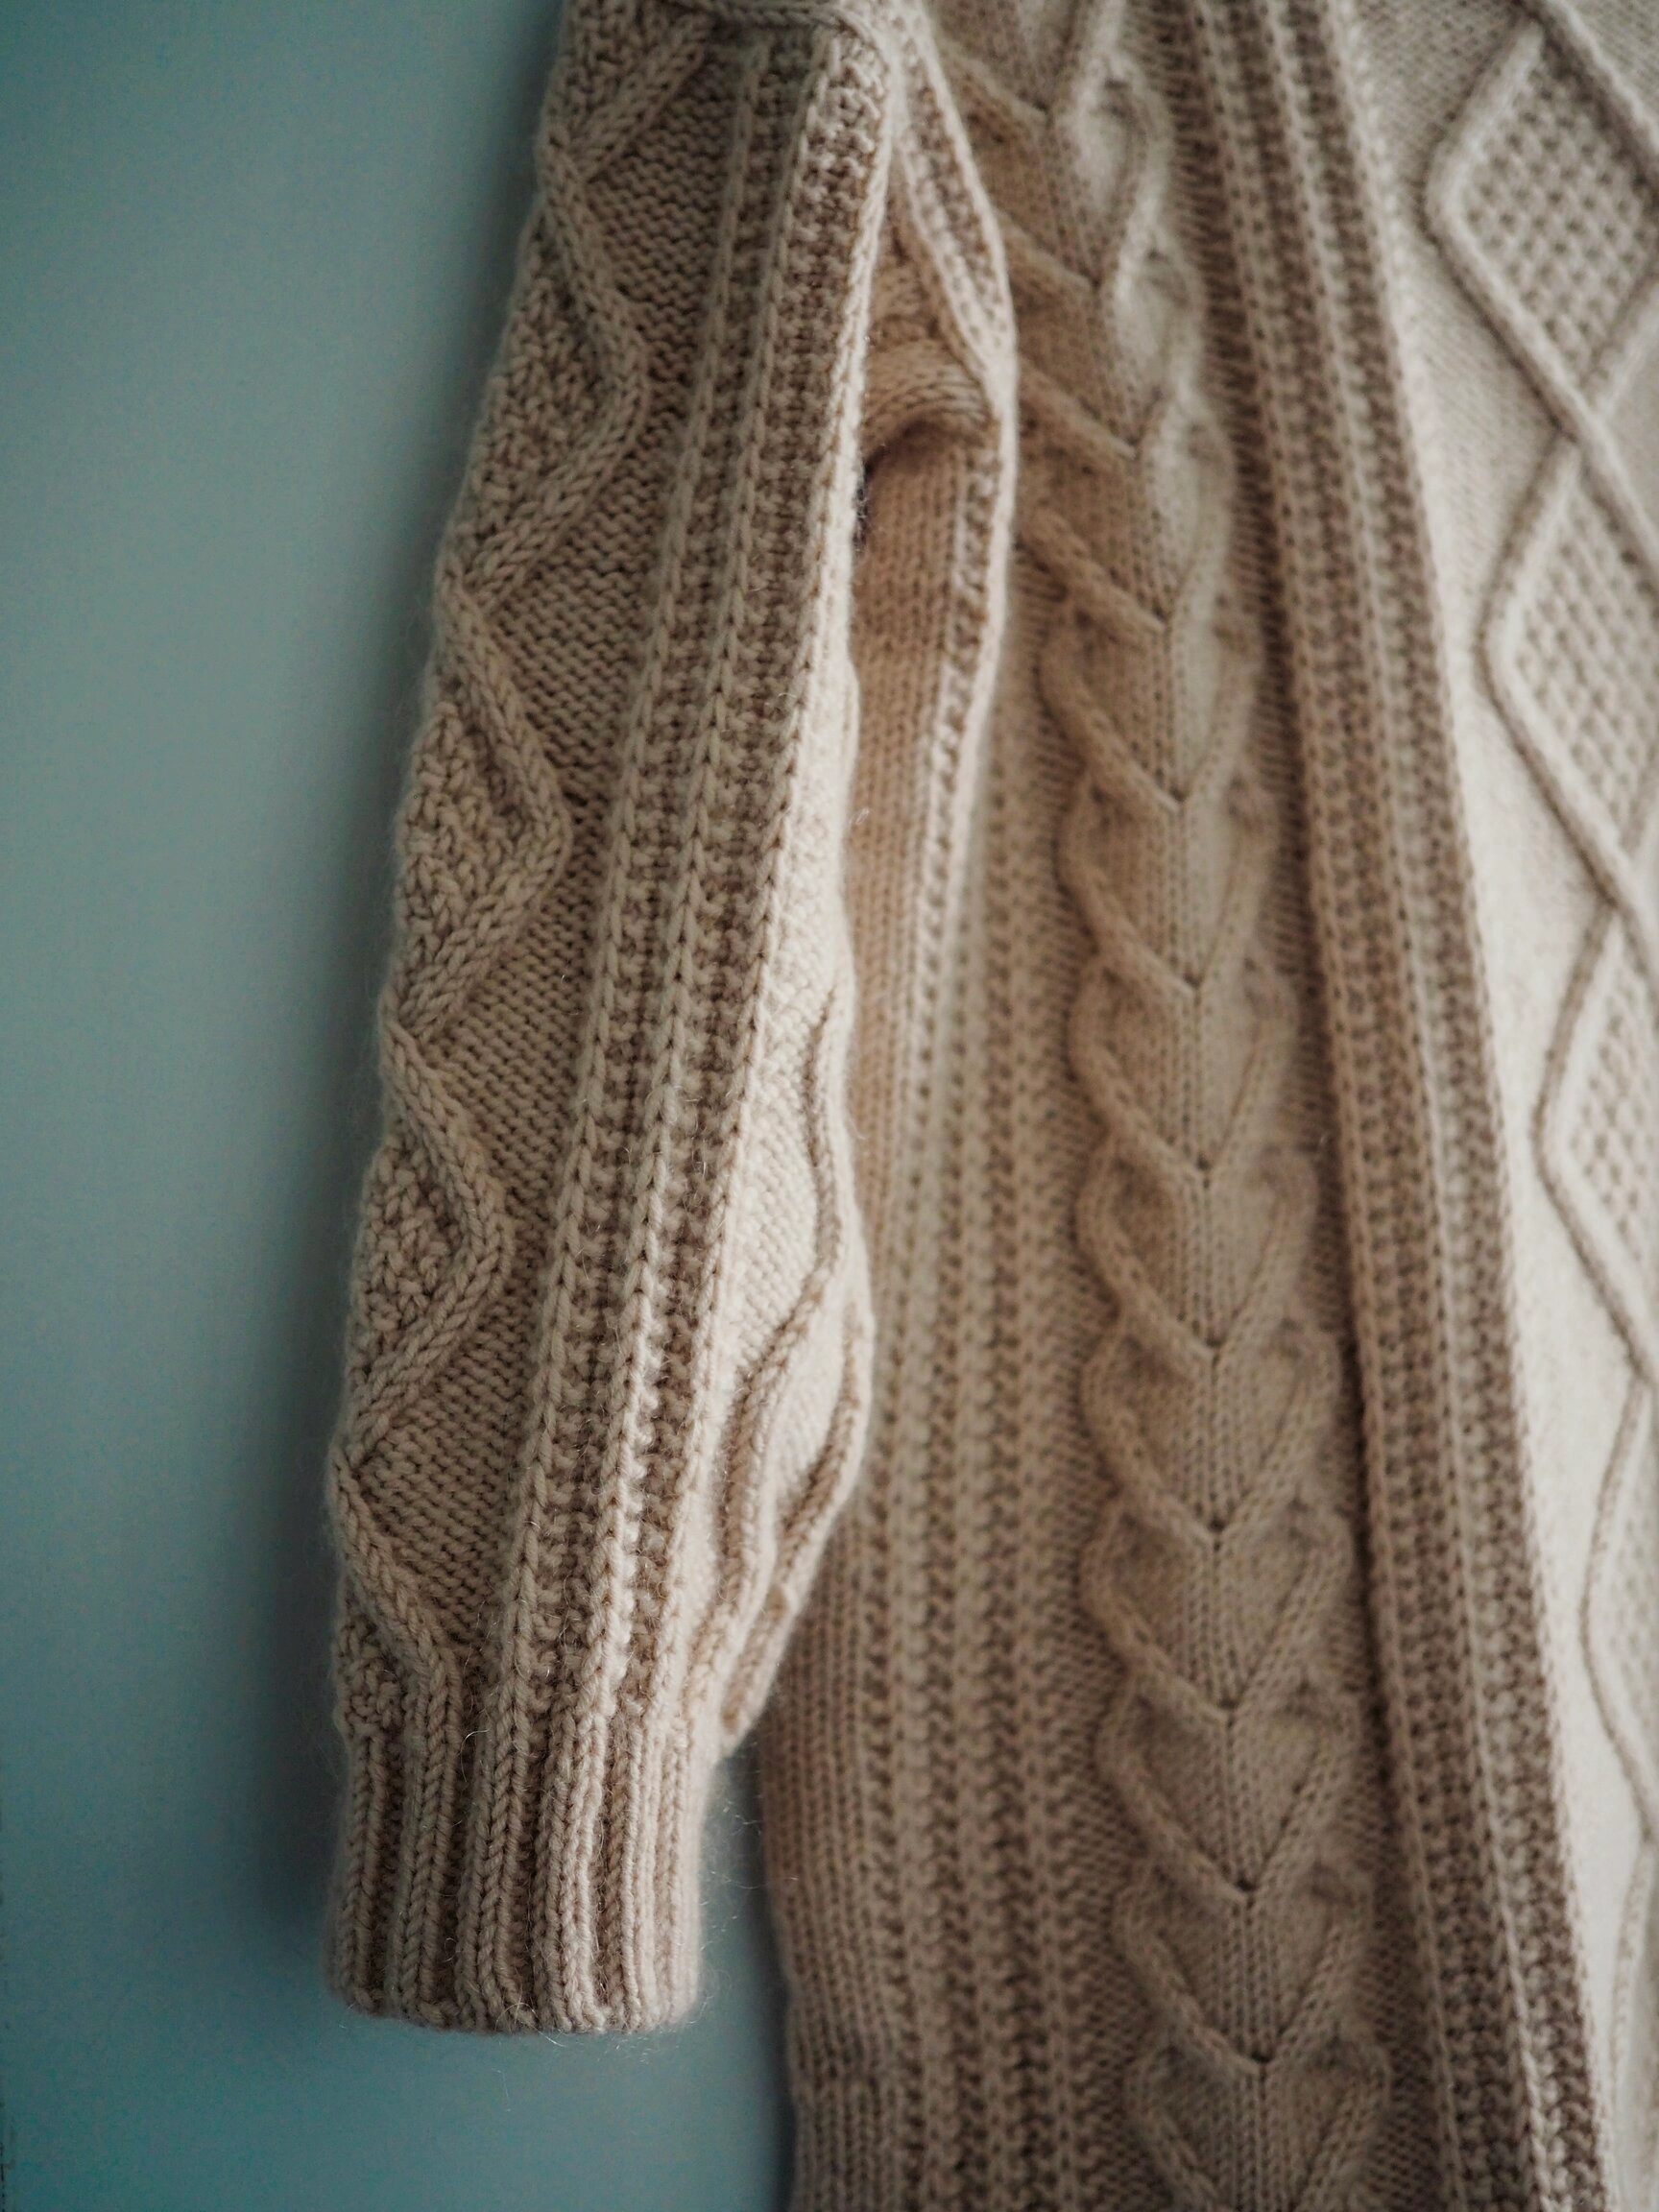
Slip rib stitch pattern in the body
I’m planning for this sweater for a while and intend to make it as an oversized sweater dress. The original pattern has too many cables to my liking and I want a more minimalistic style, like the one I found on the internet. My idea is to replace the small cable with a slip rib pattern (I’m thinking incorporating the stitch pattern in the No Purl Scarf), so it will have diamond in the middle, and slip rib and heart cable on the side.
The challenge is that the count of sts in the pattern does not corresponded to slip rib pattern, and it only applies to working in flat, so I did few samples to test whether it can be maintained when working flat and then in the round. After some trial and error, I finally figure it out.
- To get started:
- Divide the each cable chart into heart/diamond/cable sections
- For size S, instead of casting on 10 sts in each cable section, CO 11 sts instead, because the slip rib pattern needs a multiple of 4 + 3 stitches. This will be the slip rib section(s).
- Start with working in flat when it comes to the slip rib section:
- Row 1 (RS): k3, *sl1wyif, k3, repeat from * to end of row
- Row 2 (WS): k1, *sl1wyif, k3, repeat from * to last two stitches, sl1wyif, k1
- Repeat rows 1 and 2
- Keep working in slip rib section as follows after joining in the round:
- Row 1 (RS): p1, *sl1wyib, p3, repeat from * to last two stitches, sl1wyib, p1
- Row 2 (WS): k3, *sl1wyif, k3, repeat from * to end of row

Left front and right front
A slip rib section (5 sts in size S) will replace the stockinette section.
Selvage stitch edge and increase for left front
- (Left front) Start the slip rib section in row 2: k1, sl1wyif, k3.
- In the following round, continue slip rib pattern as in working in the round. When the pattern asked for increase, use backwards loop method to maintain the slip rib pattern.
- Also use the following to keep a selvage st edge for easier picking up:
- WS: slwyif the last stitch
- RS: k1 the first stitch
Selvage stitch edge and increase for right front
- (Right front) Start the slip rib section in row 2: k3, sl1wyif, k1.
- In the following round, continue slip rib pattern as in working in the round. When the pattern asked for increase, use backwards loop method to maintain the slip rib pattern.
- Also use the following to keep a selvage st edge for easier picking up:
- WS: slwyif the first stitch
- RS: k1 the last stitch
Joining the left and right front
- Using cable cast on for the front stitches CO, and also CO an extra st at the end of CO edge and bind it off to get a smoother transition without hole.
Avoid holes in the arm pit
- Rnd 1: When joining front and back, CO 8 sts on each side, using cable cast on. Bind the last CO st off with the next one (7 CO sts)
- Rnd 2: In the following round, when encountering the gap before the 1st CO st (aka last st of the slip rib panel), do a lifted decrease to close the gap. Knit all CO sts. (7 CO sts)
- Rnd 3: Knit all CO sts
- Rnd 4: For the first CO st, k2tog (6 CO sts)
To maintain the slip rib panel after working in the round
- Row 1 (the row when joining front and back): k3, *sl1wyif, k3, repeat from * to end of row
- Row 2: p1, *sl1wyib, p3, repeat from * to last two stitches, sl1wyib, p1 Repeat the two rows
Lengthen the body
I knitted total 5.5 diamonds in the front. Here is how to lengthen the chart: After row 102:
- Repeat heart pattern from row 103-114
- Repeat diamond pattern from 71-102
I achieved the desired length when I’m at five and half diamonds, ending at row row 114.
Slip rib in sleeves
- Row 3: replace the 10 sts cable section with the slip rib stitch pattern: p1, *sl1wyib, p3, repeat from * to last two stitches, sl1wyib, p1. Decrease the last 2 sts by k2tog
- Row 4: continue the chart and the slip rib stitch pattern
Lengthen the sleeves
After row 85:
- Repeat diamond pattern from row 62-074
- Repeat cable waves pattern from row 66-78
More relaxed sleeves
- Stop decrease once finishing row 41
- Resume decrease from row 65. Starting this round, do decrease as if it’s in row 49
Bind off for ribbing
Use folded collar for the neck. For other ribbing in cuff and body, use invisible Italian bind off.
Project timeline
- – Planning.
- – Cast on.
- – Finish the back panel.
- – Finish the left and right front panel, joining the front.
- – Joining front and back.
- – Finish the collar in a day. Continue the endless aran in the body…
- - Put body on hold and pick up the sleeves stitches.
- - Finish the right sleeve.
- - Finish the rest of body and block.
New techniques learned
- Folded collar
- I also tried adding a GSR in the body ribbing because it’s said most people has neater result inside of the ribbing. Unfortunately this trick didn’t work well for me. I can’t tell any difference at all! Looking from the bright side, I guess it means my ribbing tension is quite even.